How to Setup an OpenVPN Server to Secure Your Network
Hosting your own VPN server can secure your network by allowing you to set rigourous firewalls in place (to block important services like SSH), while still being able to maintain administrative access when you’re connected to the VPN.
Why Would I Need a VPN Server?
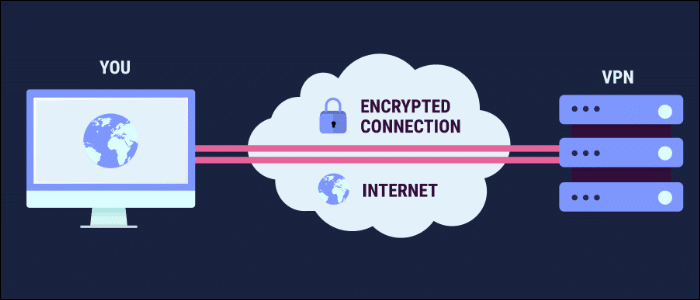
A traditional VPN like TunnelBear will secure your personal computer’s internet connection by routing your data through a middleman server. But what this is really doing under the hood is connecting you to a Virtual Private Network, allowing you to access anything that the middleman server can access, including devices on the same network.
This is very useful for accessing servers behind firewalls. For the best security, you shouldn’t leave a lot of ports open on your servers. But this leads to an issue when you lock down a bunch of ports—you can’t access them either. What if you have an database admin panel hosted on one of your servers? You obviously don’t want that open to the world, but you’d like to be able to access it when needed. You could lock access down to your IP, but what if you have multiple admins, and what if you want to access it from a coffee shop, where your IP would be different?
This is the problem a VPN server solves. Instead of connecting directly, you would instead log on to the VPN server and connect to your private cloud. From there, you can SSH to the database server, or another server running in the same VPC with access to the first. You can now behave as if your traffic is coming from the server you’re connection to, which would make the admin panel visible to you only when connected via your VPN.
This also has the added benefit of securing your connection in places like coffee shops, where your internet browsing isn’t extremely secure. This isn’t the primary purpose of this, but it’s nice to have.
Set Up an OpenVPN Server
While you can install the command line version of OpenVPN, it’s quite complicated and involves creating your own certificate authority an managing keys.
What you’ll want is the OpenVPN Access server, which is installable as a package and comes with a web interface for managing your VPN’s settings. It’s free for two simultaneous connections, which should be enough for the simple use case of managing servers behind a firewall. If you need more connections, the actual VPN part of OpenVPN is free and open source, you’ll just have to configure everything manually.
One thing to note is that the OpenVPN Access Server will make use of port 443 for redirecting traffic to the web interface, hosted on port 943. If you have things running on that port, you’ll have to either use port 943 and manually reroute 443 back to your other applications, or just run OpenVPN on a smaller server hosted in the same VPC, as it’s fairly lightweight with just one user.
Get started by downloading the OpenVPN package for your distro. The supported distros are Ubuntu, Debian, CentOS and RHEL. Grab the link for your package, and download it from the command line with wget:
wget http://swupdate.openvpn.org/as/openvpn-as-2.1.12-Ubuntu16.amd_64.deb
Install the package with dpkg on Ubuntu/Debian:
dpkg -i openvpn-as-2.1.12-Ubuntu16.amd_64.deb
On CentOS/RHEL, you’ll have to use rpm -Uvh on the .rpm file.
During installation, OpenVPN will configure itself with default settings, set up its private CA to secure your connection, and tell you from where the client web service is being served. Usually this is just your server’s IP address over HTTPS, but it could also be served without a redirect from port 943. The admin UI is served on /admin.
The only thing OpenVPN doesn’t configure is a password. You’ll want to set a password for the user “openvpn”:
passwd openvpn
You’ll have to enter this twice, and can change it at any time.
Connecting to OpenVPN
Now you can navigate to the admin UI, hosted on:
https://your-servers-ip-address/admin
You might get a big red warning from Chrome about the certificate being invalid. This is because your VPN server isn’t recognized as a proper certificate authority, which, of course, is true. However, because you set it up yourself, you obviously trust the certificate, so you can bypass this warning.
You’ll be asked for a username and password; simply enter “openvpn” and then the password you set:
The default authentication method is PAM, which uses local account-based authentication. Create a new user from the “User Settings” tab:
This is the user you’ll use to connect to the VPN service. To access it, you can navigate to the client service, hosted on:
https://your-servers-ip-address/
…though it may be running on port 943. You’ll be asked for your username and password, and have two options of connecting: connecting directly to the VPN, or connecting a client. Choose “Connect Client,” as you’re not using this as a web-surfing VPN.
This will give you a configuration file (client.ovpn), which you can use in any client supporting the OpenVPN protocol. You can use OpenVPN’s own client, or a third-party client like Pritunl, or connect manually with your user name and password in Windows and macOS.
Once you’re connected, all your internet traffic will be routed through the VPN, including requests to other servers. Any SSH connection you make will appear as if the VPN server is making an SSH connection. You’ll still need to make sure these servers are configured to allow the VPN server to access them, and you’ll still want to secure your other servers with SSH keys.
On a service like AWS, some ports may be closed by default. You’ll need to open port 443 and 943 on the VPN server, and lock down ports on other servers to only be accessed from the VPN server’s IP address. Most services though will have 80 and 443 open without any need to configure a firewall, as they’re primarily used for web traffic.
Comments are closed.